
Peel-and-stick backing · B2B custom patches
Custom Sticker Patches
Your design. Peel, position and press.
Custom sticker patches combine a dimensional patch face with pressure-sensitive adhesive and a peel-away release liner. Choose embroidery for raised thread texture, woven construction for small lettering, or a printed face for detailed color artwork. Custom stick on patches suit promotional handouts, presentation packaging and compatible smooth surfaces without a heat press or sewing. Tell us what they will stick to and how long they need to stay there: adhesive performance depends on the actual surface, patch size and conditions of use.
200 pcs minimum order
Custom artwork · Bulk orders · Backing guidance

01 / Patch face
02 / Pressure-sensitive adhesive
03 / Peel-away liner
Free Artwork & Design
Free Worldwide Shipping
Fast Air Delivery via DHL, FedEx & UPS
Direct Factory Service, No Middlemen
On this page
Why Choose Sticker Backing For Your Patches?
Peel and Apply Without Heat
Custom peel and stick patches arrive with a protective release liner. Peel it away, position the patch and press across the whole face on a compatible surface. Attachment comes from pressure-sensitive adhesive, so there is no iron-on activation step or garment-side loop panel to install.
A Patch Face with Sticker Convenience
Keep the texture of embroidery or the fine detail of a woven or printed patch while using a peel-and-stick reverse. This gives event kits and branded packaging a textile element that a flat paper label cannot reproduce. Face construction and adhesive suitability are separate choices.
Distribute Ready-to-Apply Designs
A release liner keeps the adhesive covered until the recipient is ready to use it. Include a clear surface recommendation and application instructions with giveaways. Specify any individual packaging requirements when requesting your quote so the patches remain protected during distribution.
When to Choose Custom Sticker Patches
Short-Term Promotions
Use custom stick on patches for event packs and temporary branding when recipients need a simple application method. Confirm the receiving material first; temporary use does not mean the adhesive is safe for every garment or leaves no residue.
Compatible Flat Surfaces
Smooth, clean and dry surfaces provide more adhesive contact than dusty, porous or deeply textured ones. Test the exact notebook cover, presentation box or device case before ordering, including any paint, laminate or surface coating.
No Sewing or Heat Application
Choose custom adhesive patches when a pressure-applied attachment suits the project. They do not require puncturing the receiving surface or heating it, but surface compatibility and removal behavior still need checking on a representative sample.
When Another Attachment Is More Suitable
Choose the attachment around the expected use, not simply the easiest installation. Sticker backing is not a substitute for every permanent or reusable fastening.
Washable Clothing Programs
For garments that will be washed repeatedly, consider sew-on patches, or iron-on backing on compatible heat-safe fabric. Do not specify ordinary sticker backing as a machine-washable attachment.
Regular Patch Swapping
Use hook-and-loop patches for repeated removal and replacement. A sticker adhesive can collect lint or lose contact after lifting; it should not be ordered as a reusable fastening without a specific, verified requirement.
Rough, Curved or Coated Materials
Deep texture, tight curves, stretch fabrics, silicone finishes and some plastics can prevent reliable contact. Test the actual substrate; if the patch edges lift or the surface is damaged on removal, change the placement, backing or attachment method.
Specify the receiving surface before production. A photo identifies the placement but cannot establish adhesive compatibility. Provide the material and finish, plus a physical sample when application or removal testing is required.
Plan the end of use as carefully as the first application.
Custom sticker patches may leave adhesive residue, lift paper fibers or affect a delicate coating when removed. Test an inconspicuous area on the actual material and agree what an acceptable removal result looks like. Do not promise recipients residue-free removal, wash resistance or outdoor durability unless those properties have been established for the supplied patch and receiving surface.
01 / Applications
Where Do Custom Sticker Patches Work Best?
Events & Promotional Kits
Include peel-and-stick patches in welcome packs, launch kits or short-term promotions. Choose a manageable patch size and provide a tested surface recommendation. For temporary apparel placement, check the garment fabric and removal result before distribution.
Presentation Boxes & Packaging
Add a textile emblem to smooth presentation packaging. Verify the exact paperboard, varnish or laminate because rough stock and coated surfaces behave differently. Treat removal from paper as potentially damaging rather than describing the patch as repositionable.
Notebooks & Device Cases
Use a patch on a compatible flat cover or case where its full reverse can contact the surface. Avoid vents, ports, hinges and tightly curved edges. Silicone cases and low-surface-energy plastics need an adhesive compatibility check; smooth appearance alone is not proof of suitability.
Indoor Displays & Sample Presentations
Position small textile emblems on tested display boards or presentation surfaces. Check whether the display will be vertical and whether patch weight or edge projection causes lifting. A mock-up approval should cover adhesion as well as visual placement.
02 / Build your patch
Configure Your Custom Sticker Patches
Specify the patch face, adhesive reverse, finished outline and liner together. A good-looking design must also sit flat on the receiving surface.
01 / CHOOSE YOUR PATCH
Patch Face Options for Custom Sticker Patches
Embroidered, woven and printed faces are the main options to consider for custom sticker patches. Select texture and artwork detail first, then assess the finished patch weight and flexibility for the intended surface.


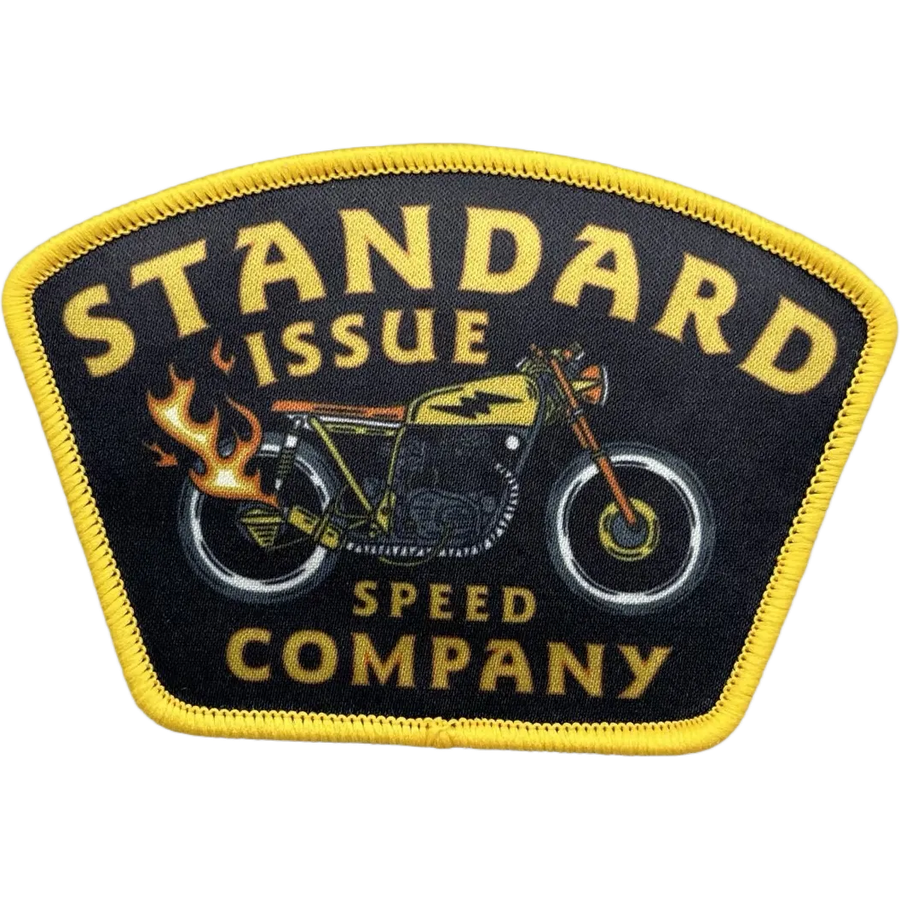


Face material affects adhesive demands. Embroidery adds texture; woven construction supports fine lettering; printing suits gradients and detailed artwork. Chenille and molded PVC may be heavier or more dimensional, so confirm a suitable adhesive construction before selecting them. A material card is a design option, not a guarantee of compatibility with every backing.
02 / Select the attachment
Choose Sticker Backing
Order a pressure-sensitive adhesive reverse with a protective release liner for custom peel and stick patches. The other backing options below serve different installation needs.

Sew-On

Iron-On

Velcro
Sticker
Backing for this page
Specify the receiving material and finish, indoor or outdoor exposure, intended duration and removal requirements. Confirm adhesive coverage and how the liner will be lifted. Sticker backing does not mean iron-on adhesive, and neither should be substituted for the other without approval.
03 / CONFIRM THE BORDER TYPE
Confirm the Border Type
Choose a border that suits the patch face and outline. Raised edges, sharp points and stiff corners can catch and start lifting, particularly on curved surfaces. Check that the adhesive supports the usable reverse while remaining inside the finished outline; confirm edge appearance on the actual sample.
Chenille Borders

Double Felt Border

Embroidered Border

Single Felt Border
Standard Borders

Merrow Border

Hot-Cut Border / Embroidered Border
04 / CONFIRM THE ARTWORK & FINISHED PATCHES
Approve the Artwork and Adhesive Construction
Approve the visual proof and the backing specification before bulk production. A digital proof cannot demonstrate adhesion or removal behavior.
1
Send Us Your Design
Send your logo, finished dimensions, quantity and intended surface. Include the material finish, application location and whether removal must preserve the receiving item.
2
Approve Your Digital Proof
Check the design, border, adhesive coverage and liner arrangement. If attachment performance matters to the project, arrange a physical sample test on the actual receiving surface before bulk approval.
3
Receive Your Custom Patches
We produce to the approved patch specification and inspect the finished patches. Keep the liners in place until use and follow the application and storage instructions agreed for the supplied adhesive.
Order details
What to Send for a Custom Sticker Patch Quote
A complete brief for custom adhesive patches connects the artwork to the surface and use conditions. Include these details so the quote covers the construction you need.
How to Contact Us & Discuss Your Project
1. Complete the Order Form
Click Order Now and complete the form using the requirements above. Your configuration and uploaded artwork are sent to our company email when you submit. We will contact you as soon as possible to confirm the details.
2. Chat on WhatsApp
Click Chat on WhatsApp below to talk with our team about your patch project or cooperation requirements.
3. Email Our Team
Contact our custom patch company at sales@patchcraftpro.com with your artwork and project requirements. For ongoing supply, include the patch types and order schedule you expect.
For a clear digital proof and an accurate quote: if you contact us by WhatsApp or email, please include the same patch requirements requested in the form above, together with your artwork. These details help us understand exactly what you need.
Knowledge about Sticker Patches
How pressure-sensitive backing works, and what determines a successful application.
What Is a Sticker Patch?
- A patch face plus an adhesive reverse. Custom sticker patches use embroidery, woven fabric or another approved patch construction on the front, with pressure-sensitive adhesive protected by a release liner on the back. They are distinct from ordinary printed paper stickers.
- Pressure creates contact; heat is not the activation method. After the liner is removed, pressing the patch brings the adhesive into contact with the substrate. Follow the supplied adhesive instructions for pressure and any settling period rather than using iron-on temperature settings.
Surface Compatibility Matters
- The finish is part of the substrate. Paper, paint, laminate, fabric coatings and plastics have different adhesion characteristics. Dust, oils, moisture and pronounced texture reduce contact. Verify the complete surface, including its coating, rather than selecting adhesive from the material name alone.
- Test the finished patch. Patch stiffness, weight, size and placement can change the result. A loose piece of adhesive on a flat test sheet does not establish how a heavy or pointed patch will behave on a curved item.
Removal, Reuse & Washing
- Plan for one placement unless agreed otherwise. Lifting can contaminate or disturb the adhesive, and pressing it down again may not restore the original contact. Use a removable fastening system when frequent swapping is required.
- Sticker backing is not automatically washable or residue-free. Removal can affect fabrics, paper fibers and coatings. Test both attachment and removal under the intended conditions; for routine garment laundering, specify an appropriate sewn or heat-applied construction instead.
Embroidered vs Woven vs Printed Faces
- Choose around the artwork. Embroidery creates a raised thread surface. Woven patches reproduce finer thread detail with a flatter construction. Printed patches can carry gradients and detailed multicolor images. Adhesive performance must still be assessed separately from image quality.
- Match flexibility to placement. A thick face or bulky border may not follow a curved surface, leaving the edges unsupported. Smaller dimensions or a flatter construction can improve contact, but cannot make an incompatible adhesive and substrate bond reliably.
How to Apply Custom Peel and Stick Patches
- 1. Check the surface. Use the material and finish confirmed for the order. Test a discreet area first when appearance after removal matters.
- 2. Prepare the placement. Follow the receiving item’s cleaning instructions and let the surface dry fully. Avoid cleaners that leave a film or damage the finish.
- 3. Peel the liner. Handle the patch by its edges and avoid touching the adhesive. Keep fingers, lint and dust away from the exposed reverse.
- 4. Position and press. Place the patch once, then press firmly across the whole face and around its edges as directed for the adhesive. Do not heat it as if it were an iron-on patch.
- 5. Inspect before use. Look for lifting corners or gaps. Follow any settling and handling instructions supplied with the order. If contact fails, investigate the surface or construction instead of simply adding more pressure.
Iron-on vs Hook-and-Loop vs Sew-on Patches
| Comparison | Iron-on Patches | Hook-and-Loop Patches | Sew-on Patches |
|---|---|---|---|
| Attachment method | Applied to the garment with heat-activated adhesive using a heat press or iron. | The patch has a hook backing, while the garment needs a sewn-on loop surface for attachment. | Stitches secure the patch directly to the garment around its edge. |
| Installation considerations | Check that the garment tolerates heat and pressure. Application time and cost depend on the fabric, equipment, and batch setup. | Higher cost because the loop side must be sewn onto the garment first, adding labor and processing time. | Allow for sewing access, thread choice, and stitching time at each placement. |
| Flexibility | Intended to stay attached; not designed for routine removal or swapping. Permanent backing. Once applied, it is difficult to remove. | Removable, replaceable, and reusable. | Intended as a fixed attachment; removing it requires unpicking the stitches. |
| Reuse | Low reusability. The patch usually stays with the garment until the garment is no longer used | High reusability. The patch can be removed and used on other garments. | May be transferred after careful unpicking, but inspect the patch and garment for stitch marks or damage. |
| Washing considerations | Confirm compatibility with the garment’s care routine. Do not assume the bond is suitable for industrial washing or high-temperature drying. | Remove the patch before washing when instructed, and follow the care requirements for the garment and loop panel. | Follow the care requirements of the garment, patch, and thread. Inspect stitching and edges during repeated use. |
| Suitable applications | Suitable for shirts, polo shirts, school clothing, hospitality apparel, and light workwear. | Suitable for jackets, tactical gear, security workwear, vests, outdoor workwear, and heavy-duty workwear. | Consider for permanent school, company, and workwear emblems where sewing is permitted. Check coated, waterproof, or protective garments before stitching. |
03 / Backing checks
Quality Checks for Custom Adhesive Patches
Check the finished adhesive-backed patch against the approved specification. Visual inspection and surface testing answer different questions.
Adhesive Coverage
Check that the adhesive covers the specified reverse area without protruding beyond the outline. Bare areas, contamination or exposed adhesive at the edge can compromise contact or handling.
Liner Protection & Release
Verify that the liner protects the adhesive during handling and separates as intended. Investigate torn liner fragments, exposed patches of adhesive or adhesive lifting away with the liner.
Full-Surface Contact
Apply an agreed sample to the actual substrate. Check edges and corners after the specified settling period and under the intended orientation, especially for larger designs on vertical displays.
End-of-Use Result
When temporary placement is required, assess removal on the actual material. Record residue, staining, fiber lift or coating damage against the agreed acceptance criteria; a clean result on one surface does not establish it for another.

Factory-direct B2B support
Why choose PatchCraftPro?
Factory-direct pricing, without layered outsourcing
We are a patch factory, not a middleman adding markups after passing the order through multiple subcontractors. Product options are quoted at factory-direct pricing.
See the design first, then pay after approval
We do not collect payment before you confirm the design effect. If the design or sample result is not satisfactory, you can request unlimited free revisions before production begins.
Every patch checked, plus 5–10% extra quantity
Every patch is inspected before shipment with a 100% quality guarantee. We also include approximately 5–10% extra patches at no charge—for example, a 200-piece order ships with about 210 pieces—to protect both usable quality and delivered quantity.
Built for B2B batch production and technical support
As a direct patch manufacturer, our factory operates more than ten imported Barudan and Tajima machines configured for B2B batch production, supported by a professional technical team. Global air-express shipping is free, carries no import duties, and normally arrives in 5–15 days instead of the 20+ days commonly required by sea freight.
Why Are Our Custom Sticker Patches Better?
- Artwork-led face selection: We compare embroidered texture, woven detail and printed artwork at the finished size so the patch construction supports the design rather than hiding small text or gradients.
- Surface information included in the brief: The intended material, finish and placement are recorded alongside the sticker backing requirement. This gives the adhesive decision a practical reference instead of treating every receiving item as interchangeable.
- Proof and sample checks serve distinct purposes: Approve artwork and dimensions digitally. Arrange a physical sample when you need to assess adhesion, edge contact or removal before committing to the bulk order.
A Complete Patch-and-Surface Specification
- Define the reverse: Confirm adhesive coverage, the protective liner and handling requirements along with the patch face and outline. Keeping these details together reduces mismatches between design approval and application.
- Define the expected result: State how the item will be used and what must happen on removal. Any requirement for wash resistance, weather exposure or repeated repositioning needs specific assessment rather than a general durability claim.
Smooth Packaging & Presentation Surfaces
For presentation boxes, notebooks and display panels, prioritize full contact and a manageable patch profile. Confirm the exact coating or laminate and whether damage during removal is acceptable.
Temporary Textile Placement
For event apparel, test the actual fabric for adhesion, appearance and removal. Loose fibers, stretch and surface treatments can change performance. For regular wear and washing, choose an appropriate permanent or removable fastening instead.
Our Services
Practical support for your uniform patch project, from artwork review to packing and delivery arrangements.
Artwork & Proof Support
Send your logo and requirements for review. Confirm the digital proof and order details before production; discuss any physical sample needs in advance.
Patch Selection Advice
We help you compare patch types and attachment options around your design, uniform fabric, placement, and intended use.
Order Quality Checks
Your approved artwork and order specification provide the reference for production and checks before shipment.
Packaging & Delivery Support
Tell us your brand-label, individual or grouped packing, white-label, or neutral-shipping needs before quotation. Packaging details and destination requirements are confirmed for your order.
10-Day Leadtime
Bulk production completed in as fast as 10 days, rush order available.
Inside a Real Patch Factory
Real equipment. Real production accountability.
Our workshop brings digital design, sampling, embroidery production, finishing and inspection together in Humen, Dongguan.


COMPARE THE PROCUREMENT ROUTE
China vs USA Custom Patch Maker
Use the same artwork, quantity, finished size, and attachment when comparing suppliers. This is a purchasing checklist, not a claim that every supplier in one country works the same way.
| Buying factor | China-based factory supply | US-based supplier |
|---|---|---|
| Cost | Highly competitive due to integrated supply chains and economies of scale. Ideal for bulk orders. | Higher costs driven by labor and material expenses. More suitable for small, premium orders. |
| Customization | Extremely flexible. Wide range of options including backing types, patch types, and custom shapes. | More limited. Typically focused on a few standardized production options. |
| MOQ | Flexible. Can handle everything from small batches to large-scale production (up to millions of units). | There is usually no minimum order requirement, but pricing is generally based on size rather than the actual technical details and production costs of the patch. Patches with simple designs and small-batch orders are priced much higher. Pricing for bulk orders is also difficult to control effectively. |
| Logistics | International express shipping typically takes 5–15 days, depending on the shipping method. It may be affected by customs clearance. | Local manufacturers can dispatch small-batch orders within 1–3 days. For bulk orders, most suppliers source production from other countries; dispatch may take 15 days or longer, and they cannot resolve quality issues that arise. |
| Communication | Time zone differences may exist, but most suppliers offer responsive 24-hour sales support. | No time difference. Easier communication with full language and cultural alignment. |
04 / Your questions
Custom Sticker Patches: Frequently Asked Questions
Are custom sticker patches the same as paper stickers?
No. These are patches with a textile or other approved dimensional face and an adhesive reverse. The release liner is peeled away for application. The front can be embroidered, woven or printed; sticker describes the backing, not a single face material.
Do custom stick on patches need an iron?
No. Sticker backing uses pressure-sensitive adhesive, so you peel the liner and press onto a compatible surface. Do not apply iron-on temperature settings. Follow the supplied adhesive application instructions, including any required settling period.
Can custom adhesive patches be machine washed?
Do not order standard sticker backing as a machine-washable attachment. Water, detergent, movement and drying can affect the adhesive and patch. For repeated garment washing, specify a suitable sew-on or iron-on construction and confirm the combined patch and garment care requirements.
Will custom peel and stick patches stay on any fabric?
No. Weave, loose fibers, stretch, coatings and fabric treatments affect contact. Test the actual fabric before using sticker patches on apparel, including removal if the garment must be preserved. Smooth appearance alone does not establish compatibility.
Can I remove and reuse a sticker patch?
Do not assume it can be reused. Once lifted, the adhesive may collect fibers or lose effective contact. If the design must be exchanged repeatedly, choose hook-and-loop backing on a compatible receiving panel. Repositionability must be specifically agreed and verified for a sticker construction.
Will the patch leave residue or damage the surface?
It can. The result depends on the adhesive, receiving material, finish and conditions of use. Paper fibers or delicate coatings may lift during removal. Test an inconspicuous area and agree removal requirements before production; we do not describe all sticker patches as residue-free.
Which face construction should I choose?
Choose embroidery for raised thread texture, woven construction for finer lettering, or printing for gradients and detailed color artwork. Chenille and molded PVC need an additional adhesive suitability assessment because their profile, weight and reverse differ. Confirm the finished patch, not only the face material.
What is the minimum order for custom sticker patches?
Our MOQ is 200 pcs. Send the artwork, finished dimensions, quantity, preferred patch face and shipping destination. Include the receiving surface and finish, intended use duration and any removal requirements so the backing can be specified for the project.
How should unused sticker patches be stored?
Keep the protective release liner in place and protect the patches from dust, moisture and excessive heat. Follow the storage conditions and shelf-life information supplied for the actual adhesive. Do not assume an unlimited storage life or remove liners before distribution.
Ready when you are
Start Your Custom Sticker Patch Project
Send your artwork and the surface you plan to use. We’ll help define the patch face, adhesive backing and release liner for your bulk order.
MOQ 200 pcs. Confirm the receiving surface and intended use before production.