
Stitched attachment · B2B custom patches
Custom Sew On Patches
Your design. Stitched in place.
Custom sew on patches attach directly to garments with stitching around the patch edge. Choose an embroidered, woven, printed, chenille or sewable PVC construction for your artwork. We supply finished patches for your sewing process, with the border and reverse specified for needle access. No heat press or receiving loop panel is required. Tell us the garment material, placement and care routine so your order suits the way the patches will be installed and worn.
200 pcs minimum order
Custom artwork · Bulk orders · Backing guidance

01 / PATCH CONSTRUCTION
02 / SEWABLE REVERSE
03 / PERIMETER STITCHING
Free Artwork & Design
Free Worldwide Shipping
Fast Air Delivery via DHL, FedEx & UPS
Direct Factory Service, No Middlemen
On this page
Why Choose Sew-On Backing For Your Patches?
A Fixed Stitched Attachment
Sew-on backing makes the stitching the attachment. A continuous seam around the patch holds the edges to the garment, without a releasable fastener or a heat-activated bond. Custom sew on patches suit logos and identifiers intended to stay in the same position during normal use.
Installation Without Heat Pressing
Sewing avoids the application heat needed for iron-on backing. It can be a useful option when a fabric cannot tolerate heat pressing but does permit needle penetration. Check the garment construction first: waterproof coatings, protective layers and very delicate fabrics may restrict stitching too.
A Border That Fits Your Design
Match the edge finish to the artwork and sewing route. A merrow border gives a raised outline on suitable shapes; a cut edge can follow a more detailed silhouette. Leave an accessible sewing area so the installer can secure the perimeter without covering lettering or cutting through prominent artwork.
When to Choose Custom Sew On Patches
The emblem stays in one place
Use a sewn attachment for recurring brand, team or role identification when badges will remain on the garment rather than being exchanged between shifts.
The garment allows stitching
Cotton workwear, denim and other sewable fabrics can accept a patch when the needle, thread and patch weight suit the material. Check the actual fabric and all underlying layers.
Heat application is unsuitable
Choose sewing when ironing is inappropriate but stitching is permitted. Specify a sew-on construction rather than assuming every adhesive-backed patch is easy to sew through.
When Another Attachment Is More Suitable
A permanent seam is not the right solution for every garment. Check whether installation access, needle holes or frequent badge changes conflict with the intended use.
Identifiers change frequently
Choose hook-and-loop backing when routine removal is needed and the garment can accept a compatible loop panel. Removing sewn patches requires unpicking stitches.
Needle holes are not permitted
Do not stitch through waterproof membranes or protective clothing without the garment maker’s approval. Needle holes can affect the original construction. Request an approved attachment method for that garment.
The sewing area is inaccessible
A closed lining, narrow sleeve or pocket may prevent access to the intended layer. Change the placement, open and refinish the lining professionally, or select another compatible attachment.
Sew-on does not mean suitable for every fabric. Confirm the material, sewing access and care requirements before ordering. A patch that is too stiff or heavy can distort lightweight or stretch fabric even when the seam itself is secure.
Keep Pockets and Linings Free
Before installing custom sew on patches, check the reverse of the chosen position. Stitch through the intended garment layer without closing a pocket or trapping a loose lining. Lay the garment naturally rather than stretching it beneath a stiff patch. For lined jackets or leather, plan access and needle selection with the person carrying out the sewing before the patch size and placement are finalized.
01 / Applications
Where Custom Sew On Patches Work Best
Uniforms & Workwear
Attach company emblems and fixed role identifiers to approved shirts, coveralls and work jackets. Keep the patch clear of pocket openings and specify thread and patch materials compatible with the garment’s care routine. Explore uniform patches →
Jackets & Outerwear
Use sewn logos, sleeve badges and larger back designs on denim, varsity jackets and other suitable outerwear. Match patch stiffness to the panel and plan access around linings, seams and insulation before stitching.
Motorcycle Vests & Club Patches
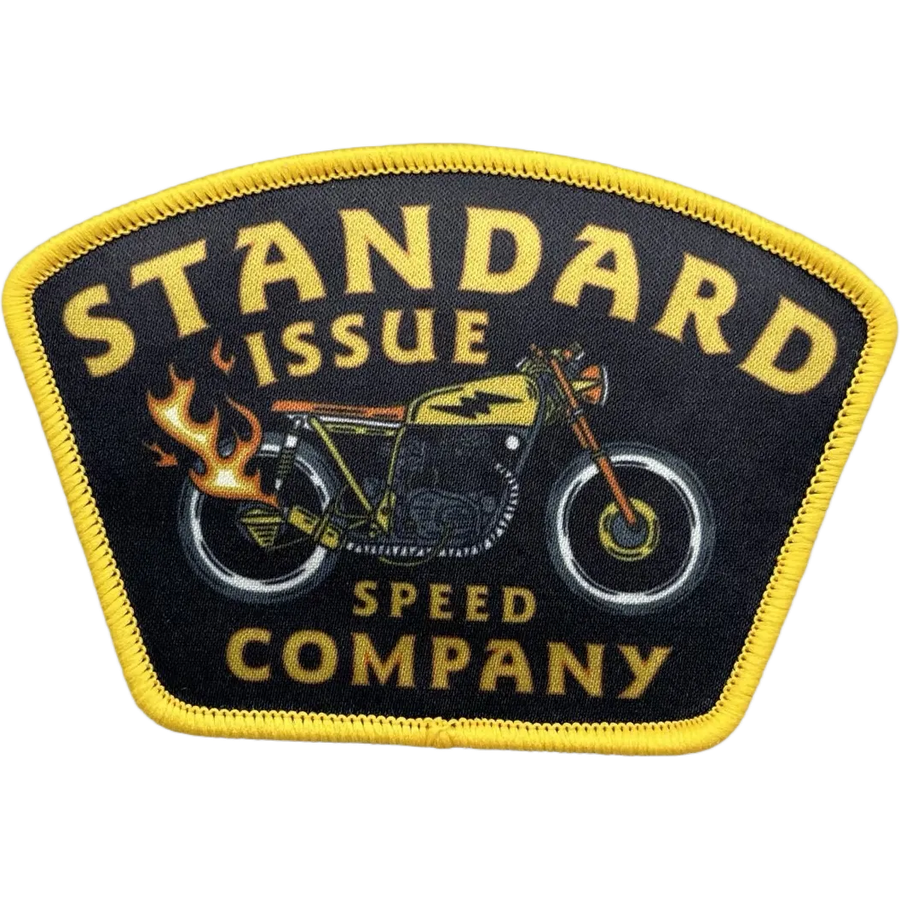
Secure club emblems and rocker-shaped designs to suitable denim or leather vests. Check the complete layout before sewing so spacing stays consistent. Leather needs appropriate equipment and careful placement because removed stitches can leave visible holes. Explore motorcycle patches →
Hats & Caps
Sew brand badges to accessible cap panels using a size and construction that follow the crown. Avoid bridging bulky seams or catching the sweatband. Check equipment access and curvature on a finished cap before approving a large or rigid patch. Explore hat patches →
02 / UNDERSTAND THE BACKING
How Sew-On Backing Works
A custom sew on patch is fixed by thread passing through its sewable edge and the receiving fabric. The seam carries the attachment load. The patch does not need an iron-on adhesive layer or a separate loop panel; a suitable reverse and accessible border let the installer stitch it directly in place.
01 / CHOOSE YOUR PATCH
5 Patch Types for Custom Sew On Patches
Choose the visible face for the design, then confirm its sewing construction. Embroidery provides thread texture, woven faces reproduce fine linework, and printed patches accommodate gradients. Chenille gives a raised pile; molded PVC needs a suitable sewing channel or sewable edge. The face material and the attachment method are separate choices.




For thick chenille, keep the sewing route clear of the raised pile. For PVC, specify a sewing channel or suitable perimeter before molding; do not assume any thick molded edge can be stitched with ordinary equipment.
02 / CONFIRM THE BACKING
Multiple Backing Options
Select sew-on for direct stitched attachment. Iron-on backing uses heat-activated adhesive; hook-and-loop allows routine removal from a compatible loop panel. Sticker backing serves different surface and handling requirements. Confirm the intended use before selecting the reverse.
Sew-On
Backing for this page

Iron-On

Velcro

Sticker
Specify sew-on construction in the order. Discuss any reverse stabilizer or coating that affects needle passage, and agree the edge finish and sewing area before production. Garment installation is a separate step from supplying the finished patches.
03 / CONFIRM THE BORDER TYPE
Confirm the Border Type
Choose the border around the patch face and leave a practical sewing route. A merrow border suits many simple outlines; a hot-cut or embroidered edge can follow more detailed shapes. Chenille uses its own felt and embroidered border options. Check that the planned seam will not cover small lettering or run too close to a cut edge.
Chenille Borders

Double Felt Border

Embroidered Border

Single Felt Border
Standard Borders

Merrow Border

Hot-Cut Border / Embroidered Border
04 / CONFIRM THE ARTWORK & FINISHED PATCHES
Confirm Digitized Artwork and Finished Patches
Approve the design, border and sewable construction before production.
1
Send Us Your Design
Send the artwork, finished dimensions and quantity, together with the garment material and placement. Include a photo of the sewing area when seams, linings or pockets may restrict access.
2
Approve Your Digital Proof
Check lettering, colors, outline and the intended sewing margin. Use a physical sample to assess thickness, flexibility and needle access; a digital proof shows the layout but cannot verify the installed seam.
3
Receive Your Custom Patches
We manufacture the approved patch construction and inspect the finished pieces. Supply your sewing team with the approved placement and attachment instructions before installation.
From Design to Delivery
How to Order Custom Sew On Patches
Request sew on patches custom-made for your artwork through our order form, WhatsApp or email. Include the installation details below so the patch face and border suit your garment.
How to Contact Us & Discuss Your Project
1. Complete the Order Form
Click Order Now and complete the form using the requirements above. Your configuration and uploaded artwork are sent to our company email when you submit. We will contact you as soon as possible to confirm the details.
2. Chat on WhatsApp
Click Chat on WhatsApp below to talk with our team about your patch project or cooperation requirements.
3. Email Our Team
Contact our custom patch company at sales@patchcraftpro.com with your artwork and project requirements. For ongoing supply, include the patch types and order schedule you expect.
For a clear digital proof and an accurate quote: if you contact us by WhatsApp or email, please include the same patch requirements requested in the form above, together with your artwork. These details help us understand exactly what you need.
Basic Knowledge about Sew-On Patches
Understand the Attachment, Prepare the Garment and Check the Finished Seam
What Is a Sew-On Patch?
- A sew-on patch is a separate emblem attached with stitching. The decorative face may be embroidered, woven, printed, chenille or molded. The stitches around its edge secure it to the receiving fabric.
- Backing and face are different specifications. Sew-on describes attachment, not a single patch material. Ask for a sewable reverse and perimeter; the finished patch may still contain stabilizing layers appropriate to its construction.
Needle, Thread and Fabric Compatibility
- Match the sewing setup to the complete stack. Consider both the patch edge and the garment beneath it. Follow the machine maker’s guidance for fabric, thread and needle combinations; one needle size is not suitable for every textile, leather or molded patch.
- Trial the seam on representative materials. Inspect for skipped stitches, puckering, broken thread and enlarged needle holes. Adjust the setup before attaching the rest of the batch rather than pulling the garment tight to hide an uneven seam.
Positioning on Lined or Stretch Garments
- Check every layer beneath the patch. Keep pockets open and loose linings free. A lined jacket may need controlled access to the outer shell and professional refinishing after sewing.
- Let the garment lie naturally. A rigid patch can restrict stretch or drape. Reduce patch size, choose a more flexible construction or move it to a more stable area if a placement test shows distortion.
Embroidered vs Woven vs PVC vs Printed Patches
- Embroidered: Textured thread detail with an edge that accommodates sewing. Woven: A flatter textile face for smaller lettering and fine lines. Check the finished border rather than stitching through key details.
- PVC: Specify a molded sewing channel or sewable perimeter. Printed: A printed textile face for gradients and multicolor artwork. Select the face for the design and the edge for installation; neither appearance nor thickness alone proves sewability.
How to Sew On Custom Patches
- 1. Confirm the position. Check the garment care label, sewing permission and access to the reverse. Mark the approved placement and keep clear of closures, pockets and bulky seams.
- 2. Hold the patch flat. Use an appropriate temporary positioning method that will not mark or damage the material. Keep the garment relaxed and the patch aligned before sewing.
- 3. Stitch the perimeter. Sew through the intended patch edge and garment layer, following the border or specified sewing channel. Use a machine or hand-sewing method suited to the material and available access.
- 4. Secure and inspect. Finish thread ends securely, remove temporary positioning aids and check the complete perimeter for missed areas, puckering or loose stitches. Confirm that pockets and linings still move as intended.
- 5. Follow the agreed care routine. Use the care limits of the patch, sewing thread and garment together. Inspect edges and seams after washing; repair loose stitching before it spreads. Sewing does not make every patch suitable for industrial laundering or high-temperature drying.
Iron-on vs Hook-and-Loop vs Sew-on Patches
| Comparison | Iron-on Patches | Hook-and-Loop Patches | Sew-on Patches |
|---|---|---|---|
| Attachment method | Applied to the garment with heat-activated adhesive using a heat press or iron. | The patch has a hook backing, while the garment needs a sewn-on loop surface for attachment. | Stitches secure the patch directly to the garment around its edge. |
| Installation considerations | Check that the garment tolerates heat and pressure. Application time and cost depend on the fabric, equipment, and batch setup. | Higher cost because the loop side must be sewn onto the garment first, adding labor and processing time. | Allow for sewing access, thread choice, and stitching time at each placement. |
| Flexibility | Intended to stay attached; not designed for routine removal or swapping. Permanent backing. Once applied, it is difficult to remove. | Removable, replaceable, and reusable. | Intended as a fixed attachment; removing it requires unpicking the stitches. |
| Reuse | Low reusability. The patch usually stays with the garment until the garment is no longer used | High reusability. The patch can be removed and used on other garments. | May be transferred after careful unpicking, but inspect the patch and garment for stitch marks or damage. |
| Washing considerations | Confirm compatibility with the garment’s care routine. Do not assume the bond is suitable for industrial washing or high-temperature drying. | Remove the patch before washing when instructed, and follow the care requirements for the garment and loop panel. | Follow the care requirements of the garment, patch, and thread. Inspect stitching and edges during repeated use. |
| Suitable applications | Suitable for shirts, polo shirts, school clothing, hospitality apparel, and light workwear. | Suitable for jackets, tactical gear, security workwear, vests, outdoor workwear, and heavy-duty workwear. | Consider for permanent school, company, and workwear emblems where sewing is permitted. Check coated, waterproof, or protective garments before stitching. |
03 / Backing-specific details
Quality Checks for Custom Sew On Patches
Check the supplied patch and the installed seam as separate stages. A neatly finished emblem still needs an appropriate sewing method on the actual garment.
Accessible sewing perimeter
Confirm that the border provides room for the intended seam without cutting across lettering or raised detail. Check narrow corners and PVC sewing channels against the approved sample.
Flatness, size & outline
Compare finished dimensions and shape with the approved layout. Lay the patch on the intended position to check for curling, bridging across seams or excessive stiffness.
Reverse & edge construction
Verify that the supplied reverse and edge match the sewing specification. Check for loose threads, fraying or an unapproved adhesive layer that could interfere with needle passage.
Installed seam performance
During the garment trial, inspect stitch formation, thread ends and fabric distortion. Check the intended wash process on the actual combination when wash performance is part of the purchase specification.

Factory-direct B2B support
Why choose PatchCraftPro?
Factory-direct pricing, without layered outsourcing
We are a patch factory, not a middleman adding markups after passing the order through multiple subcontractors. Product options are quoted at factory-direct pricing.
See the design first, then pay after approval
We do not collect payment before you confirm the design effect. If the design or sample result is not satisfactory, you can request unlimited free revisions before production begins.
Every patch checked, plus 5–10% extra quantity
Every patch is inspected before shipment with a 100% quality guarantee. We also include approximately 5–10% extra patches at no charge—for example, a 200-piece order ships with about 210 pieces—to protect both usable quality and delivered quantity.
Built for B2B batch production and technical support
As a direct patch manufacturer, our factory operates more than ten imported Barudan and Tajima machines configured for B2B batch production, supported by a professional technical team. Global air-express shipping is free, carries no import duties, and normally arrives in 5–15 days instead of the 20+ days commonly required by sea freight.
Why Are Our Custom Sew On Patches Better?
- Patch Techniques Matched to the Artwork: Choose textured embroidery, fine-detail weaving, full-color printing, raised chenille or molded PVC with a sewing channel. We match the visible construction to your design while keeping the attachment route practical.
- Edges Planned for Sewing: The border is part of the installation specification. We review the outline and sewing space so a finished seam can secure the patch without covering important lettering or crowding a narrow corner.
- Sample Review Before the Batch: Confirm the physical sample requirements before production. Review colors, dimensions, flexibility and edge construction, and use representative garment fabric to check the proposed installation.
A Sewable Construction for the Intended Garment
- Clear Needle Access: Specify the reverse, border and stitching route together. For raised or molded faces, keep the attachment seam in an accessible area rather than forcing the needle through thick decorative detail.
- Care Requirements Built into the Specification: Tell us how the garment will be washed and worn. Patch materials, edge finish and the installer’s sewing thread must work together; a strong seam alone does not establish the wash performance of the complete garment.
Lightweight Garments & Smaller Badges
For shirts, caps and lighter textiles, prioritize a flexible patch with an appropriate size and edge. An oversized or stiff badge can pull the fabric out of shape. Check the appearance with the garment relaxed and worn normally.
Workwear, Denim & Larger Emblems
For heavier garments and larger designs, plan the full perimeter and access around seams, linings and pockets. Confirm that the sewing equipment can handle the complete material stack and that the finished patch follows the garment instead of bridging across a curved panel.
Our Services
Practical support for your uniform patch project, from artwork review to packing and delivery arrangements.
Artwork & Proof Support
Send your logo and requirements for review. Confirm the digital proof and order details before production; discuss any physical sample needs in advance.
Patch Selection Advice
We help you compare patch types and attachment options around your design, uniform fabric, placement, and intended use.
Order Quality Checks
Your approved artwork and order specification provide the reference for production and checks before shipment.
Packaging & Delivery Support
Tell us your brand-label, individual or grouped packing, white-label, or neutral-shipping needs before quotation. Packaging details and destination requirements are confirmed for your order.
10-Day Leadtime
Bulk production completed in as fast as 10 days, rush order available.
Inside a Real Patch Factory
Real equipment. Real production accountability.
Our workshop brings digital design, sampling, embroidery production, finishing and inspection together in Humen, Dongguan.


COMPARE THE PROCUREMENT ROUTE
China vs USA Custom Patch Maker
Use the same artwork, quantity, finished size, and attachment when comparing suppliers. This is a purchasing checklist, not a claim that every supplier in one country works the same way.
| Buying factor | China-based factory supply | US-based supplier |
|---|---|---|
| Cost | Highly competitive due to integrated supply chains and economies of scale. Ideal for bulk orders. | Higher costs driven by labor and material expenses. More suitable for small, premium orders. |
| Customization | Extremely flexible. Wide range of options including backing types, patch types, and custom shapes. | More limited. Typically focused on a few standardized production options. |
| MOQ | Flexible. Can handle everything from small batches to large-scale production (up to millions of units). | There is usually no minimum order requirement, but pricing is generally based on size rather than the actual technical details and production costs of the patch. Patches with simple designs and small-batch orders are priced much higher. Pricing for bulk orders is also difficult to control effectively. |
| Logistics | International express shipping typically takes 5–15 days, depending on the shipping method. It may be affected by customs clearance. | Local manufacturers can dispatch small-batch orders within 1–3 days. For bulk orders, most suppliers source production from other countries; dispatch may take 15 days or longer, and they cannot resolve quality issues that arise. |
| Communication | Time zone differences may exist, but most suppliers offer responsive 24-hour sales support. | No time difference. Easier communication with full language and cultural alignment. |
04 / Your questions
Custom Sew On Patches: Frequently Asked Questions
Do custom sew on patches need ironing or glue?
No. Their attachment comes from stitching through the sewable patch edge and garment. Order sew-on construction when heat application is not required. Any temporary positioning aid is separate from the final seam and must suit the materials. Do not assume an iron-on adhesive layer is needed for a sewn installation.
Can a custom sew on patch be attached by hand?
Yes, if the patch edge and garment can be pierced with the appropriate hand-sewing needle and thread. Stitch securely around the perimeter and finish the thread ends. Thick leather, heavy material stacks and molded PVC may require specialist equipment or a defined sewing channel; confirm the method on a representative sample first.
Can custom sew on patches be machine washed?
Yes, when the patch materials, sewing thread and garment are all specified for the intended wash process. Follow their combined care requirements and inspect the seam after washing. A sewn attachment does not automatically make a patch suitable for bleach, industrial washing or hot tumble drying. State these requirements before quotation if they apply.
How do I sew on custom patches without closing a pocket?
Separate the intended garment layer from the pocket bag or lining before sewing. Keep the needle path visible and accessible throughout the perimeter. If the machine cannot reach that layer independently, use a suitable hand-sewing method, change the placement or have a professional open and refinish the lining. Do not sew blindly through all layers.
Which patch types can use sew-on construction?
Embroidered, woven, printed and chenille patches can be specified with a sewable construction. PVC patches need a suitable sewing channel or perimeter designed into the molded patch. Confirm the edge, thickness and reverse for the chosen method; the patch face alone does not determine whether an installer can stitch it successfully.
Why does the fabric pucker around a sewn patch?
Possible causes include excessive thread tension, the garment being stretched during sewing, an unsuitable needle or thread combination, and a patch that is too stiff for the fabric. Inspect a trial installation with the material relaxed. Correct the sewing setup or revise the patch construction and size before repeating the batch; extra tight stitching can worsen distortion.
Can I remove and reuse a sewn patch?
You can carefully unpick the seam, but removal may leave needle holes, thread marks or fabric damage. Inspect the patch edge before sewing it elsewhere. Choose hook-and-loop instead if routine swapping is the main requirement; a sewn seam is intended as a fixed attachment.
What is the minimum order for sew on patches custom-made to my design?
Our minimum order is 200 pcs. Send the artwork, patch dimensions, quantity, face construction, border preference and shipping destination. Include the garment material, placement and care requirements. We supply the finished patches; request any garment sewing service separately rather than assuming installation is included.
Can sew-on patches be used on leather or waterproof clothing?
Leather may accept sewing with suitable equipment and a planned needle path, but holes can remain visible if the patch is removed. Waterproof or protective clothing requires the garment maker’s approval because stitching can affect membranes, coatings or protective construction. Do not treat sew-on as an automatic alternative whenever ironing is prohibited.
Ready when you are
Start Your Custom Sew On Patch Project
Send your artwork, finished size and garment details. We’ll help specify the patch face, sewable border and reverse for your order.
MOQ 200 pcs. Confirm the sewing construction and installation requirements before production.